
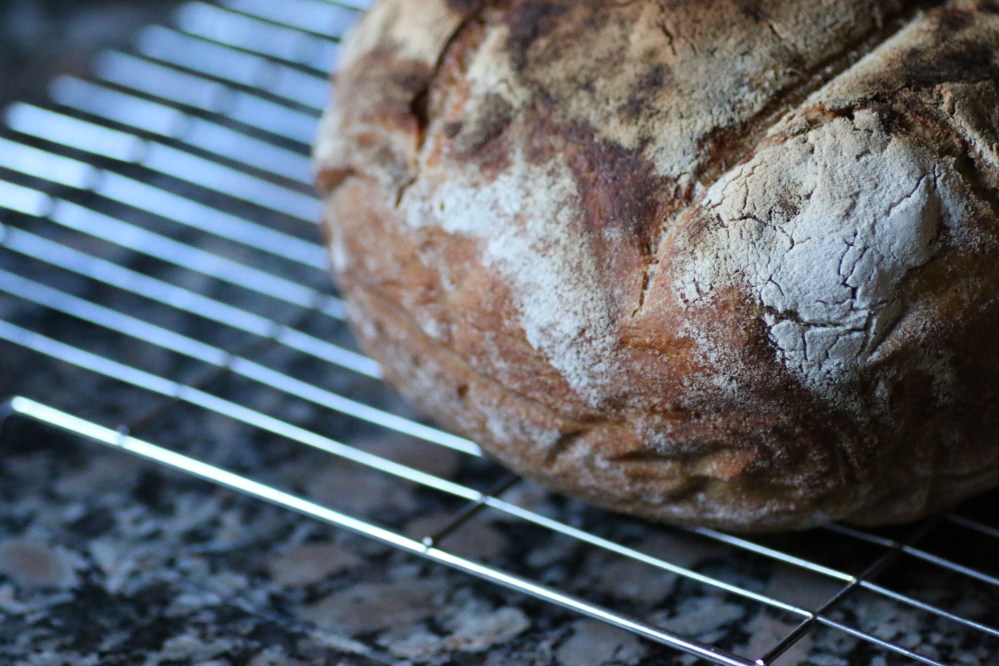
Once the staple of healthy hippies, sourdough has quickly become the best thing since sliced bread! The superb flavour of a finished loaf cannot be beaten with its tangy, chewy, smoky taste; this robust bread is the undisputed King of Bread for a reason.
Sourdough is on the rise (pardon the pun) and is as trendy as hipsters, beards and unicorn frappuccinos. Instagram is flooded with photos of artisan slices of sourdough toast with obligatory avocado topping but sourdough isn’t new of course – it’s the oldest form of leavened bread and is thought to have been around since Ancient Egyptian times.
The moreish, tangy taste blinds you to the Sourdough Paradox: it is the simplest and yet most complicated of breads to bake!
Its simplicity comes from its ingredients as all you need is flour, water and salt. You will also need patience, lots of it. This is not one of those quick loaves that you’ll knock up one afternoon in time for tea. Sourdough is not difficult to make in terms of kitchen technique but makes for great weekend baking as you will need time to potter to and from the kitchen letting the dough rest, kneading, proving, etc. Alternatively, it’s something that can be prepared on a Friday evening ready for baking on Saturday morning. Whereas commercial yeast will rise a loaf in hours, the sourdough journey takes days, helping develop its flavour and distinct crust and it all starts by making a sourdough starter.
Sourdough Starter
 A sourdough starter is just a mix of flour and water that you leave to ferment in a warm place; its new home, keep your eye on it and feed it every day. Basically, the wild yeasts feed off the flour and generate carbon dioxide which you want to trap in the bread. At the same time the bacteria present also feed, multiply and produce ethanol – which can be seen as a liquid floating on top of the batter that gives the starter its sweet, beer smell. Stir this back into the mixture as this is what gives the sourdough its distinctive taste.
Every day for a about a week, you need to feed your sourdough starter. Add equal measures of flour and water, give it a good stir and allow it to rest in its warm home. Alex French Guy Cooking on Youtube uses only mineral water as he believes the chlorine in tap water can kill both yeast and bacteria – I have used tap water without problems.
Paul Hollywood adds slices of seedless grapes to his starter, whereas Nigel Slater has been known to add yoghurt and sultanas to his. Rhubarb can also work just as well. Nigella adds a sprinkling of commercial yeast to kick hers off. I prefer to keep mine plain and true to its ancient roots. If you are going to use fruit, I recommend you sieve this out after the initial ferment as you don’t want bits of grape/rhubarb in your dough.
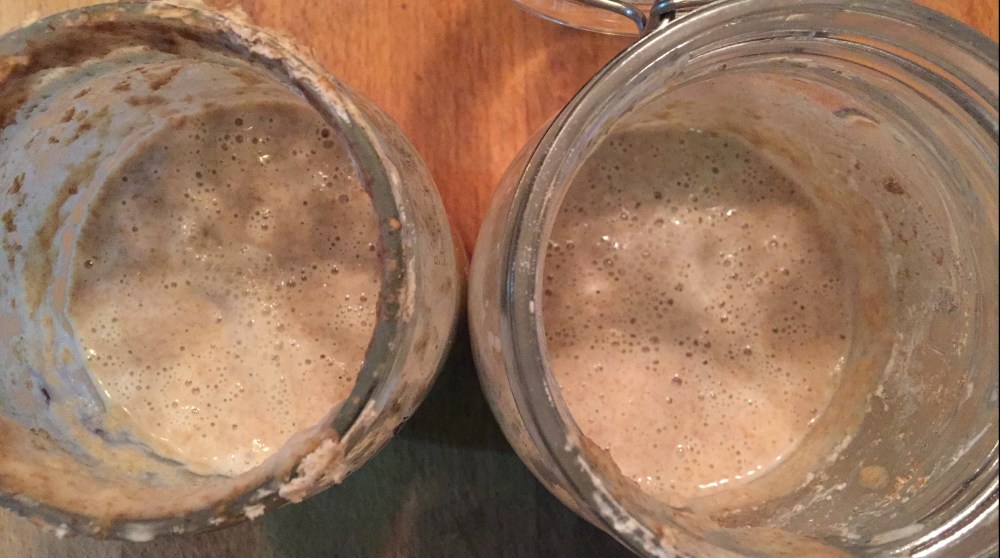
The starter can be as fickle as a tamagotchi pet! Keep your eye on it as it may seem slow at first and almost as if the thing has died on you but keep up with the ritual of pouring some out, adding equal parts of flour and water as eventually it will bloom. As long as it doesn’t smell off then you’re ok. Monitor its progress daily as suddenly it can erupt from its vessel leaving a lava-like spill down the sides of your jar and onto the shelf it’s resting on, which is not as easy to clean as you’d think! If you think there may be danger of this, pour some of your sourdough starter out reserving at least 75g of starter. Keep topping up flour and water so that you have 225g of flour mixture to work with.
At any stage you can give any excess starter to friends, neighbours – as I did, however, let them know at what stage of the process you’re at. The photos below show her results following a Paul Hollywood recipe:


Once you’ve got this going, as long as you feed it every now and again, you’ll never have to make one from scratch again! Keeping it in hibernation in the fridge will also help prolong its life or even freeze some of it for future use.
Levain
At least 12 hours before you start making your bread, mix 225g of your starter culture with 75g of flour and 75g of warm water so that you have a total of 375g (300g for the loaf and 75g to keep). Mix well and leave in a warm place. This is now the “levain” that you will be using to raise your sourdough loaf.
If it’s bubbling away several hours later, you know it’s ready. One final check is the floating test: put a spoonful of it into some water, if it floats its ready.
Sourdough bread
I followed a Hobbs House Bakery recipe but there are many sourdough recipes that you can follow and youtube tutorials to follow.
Ingredients:
460g of strong bread flour (either all white flour or a mix of spelt/wholewheat/rye)
300g sourdough starter (levain)
10g sea salt
230ml warm water
Method:

1st: Autolyse: Mix all the ingredients in a bowl and mix thoroughly using a dough scraper, a food mixer or your fingers. Let the mixture rest for 30mins so that the flour hydrates fully as this makes for a better dough. Cover with cling film or a tea towel and keep in a warm place.
2nd: Kneading and Folding: Hold the dough in your hands slap the overhang onto the surface where it should stick, and fold the rest of the dough you are still holding over. Rotate the dough a quarter turn and repeat the process for a few mins.
Repeat every 30mins for at least 3 or 4 hours (First Prove) depending on the tackiness of the dough.
3rd: Shape the dough into a ball by folding from the edges of the dough to the centre and invert this onto your surface. Use a dough scraper, cleaver or your hands and try to create some surface tension over the surface of the ball of dough by pulling the dough towards you, rotating the ball and repeating. Once you have created enough surface tension it is ready for its overnight prove.
4th: Second Prove (Overnight prove): Use either a proving basket called a banneton, or line a Pyrex bowl with a clean dishcloth and liberally dust with flour to stop the dough sticking to the basket/dishcloth. Place the dough ball upside down in the bowl and cover. Allow to prove overnight in the fridge.
5th: Take the proved dough out of the fridge at least 2 hours before you bake it so that it comes up to room temperature. Before you are ready to bake, place a dutch oven or large casserole pot into the oven and preheat to 250˚C.
6th: Very gently take the dough out of its proving basket / pyrex bowl by upturning it onto a floured bakers peel, tray or board. Taking care not to burn yourself, sit the dough in the dutch oven and spray liberally with a water bottle. Clamp on the lid and place in the oven. Bring the temperature down to 230˚C and bake for 20mins with the lid on and then another 20mins with the lid off.
If you are not going to use a dutch oven/casserole pot, then spray water directly into the oven or put a tray of boiling water into the oven as the steam generated in the oven is what gives the Sourdough its magnificent crust.
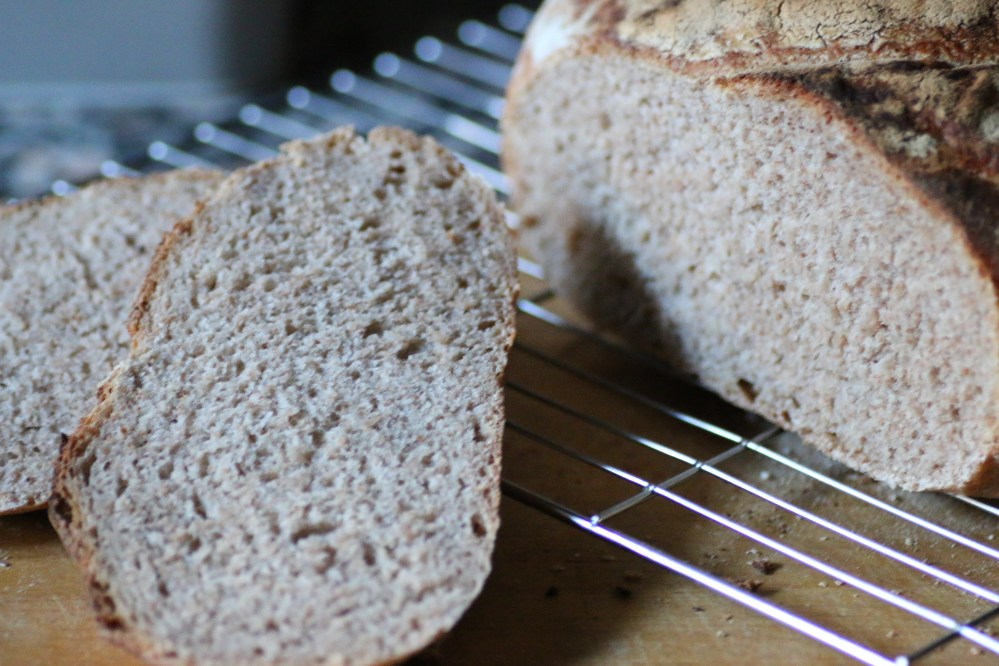
Once the bread is baked – you can check this by tapping the base, if it sounds hollow it’s ready; allow it to cool on a wire rack for at least 40mins before you cut into it.
Toasted sourdough and butter is great for Weekend breakfast as is the trendy avocado and quail’s egg or salmon combo.
Sourdough Planner
1. Sunday night create your sourdough starter. Remember to feed it every day as explained above.
2. Once you have an established starter culture: Thursday night take your sourdough starter out of the fridge and give it a feed.
3. Friday morning prepare your levain as explained above.
4. Friday evening complete stages 1 to 4.
5. Saturday morning complete stages 5 and 6.
I know that all this sounds much more complicated than going to the shops and buying a sourdough loaf but in Gibraltar, we suffer with the terrible affliction of bad bread! Everything is mass produced and plastic wrapped, frozen bread. We have few if no legitimate bakeries. Going through the process of baking your own delicious bread from scratch is not just rewarding; it feels right. It would be great to see your results.


Apparently, I’m too clutzy to use a Ball jar. I keep getting glops of starter stuck in the shoulders. Knock wood, I think my first starter will be ready for a loaf in a day or two. Your post couldn’t have come at a better time!
LikeLike
Julie I wish you every success!
Make sure to send me photos of your efforts!
LikeLiked by 1 person
Thanks!
LikeLike
A fantastic recipe and great guidance through the sourdough minefield! Thanks Gastrorob! It really is “the simplest and yet most complicated of breads to make”, but it’s so worth it! Thanks for all your help 🙂
LikeLike
Thanks Melissa for your kind words! Glad you managed to get through it in the end. Isn’t it just the best flavoured bread?!
LikeLike